
Milky nails have surged in popularity, captivating the attention of beauty enthusiasts across social media platforms. These elegant, translucent looks offer a sophisticated twist on the classic nail aesthetic, invoking a sense of simplicity and refinement. However, if you’ve ever tried to replicate this dreamy manicure, you may have encountered a few unexpected challenges that left you feeling frustrated. What makes achieving that perfect milky finish so elusive? Let’s delve deeper into the reasons why your milky nails may not turn out like the photos you adore.
As with any beauty trend, there’s often a vast disparity between what we see online and what we can realistically achieve at home. The lighting, product choices, and even nail shape can all influence the final outcome. Understanding these variables is the first step toward conquering the milky nail trend. By equipping yourself with the right knowledge and techniques, you can elevate your manicures to a level that rivals those enviable inspirations.
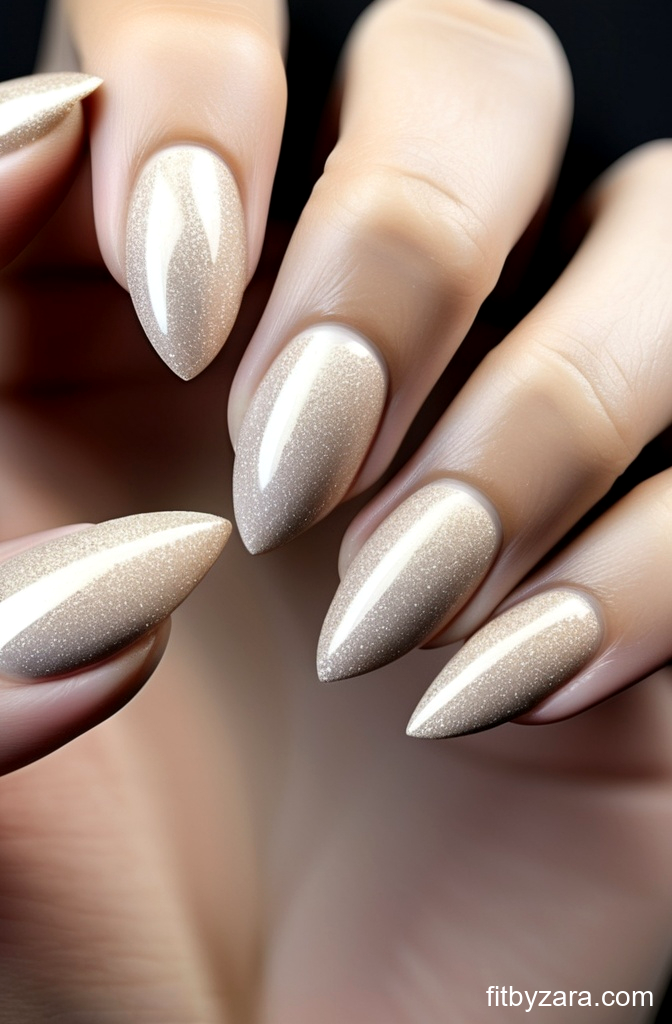
Understanding the Milky Nail Effect
Before we dig into the reasons for discrepancies in milky nail appearances, it’s essential to understand what makes this look so desirable. The milky nail effect is characterized by a soft, sheer appearance that showcases the natural nail while providing a polished finish. The key elements to this style include:
- Translucence: A balanced blend of color and clarity.
- Glossy finish: A high-shine topcoat enhances the overall effect.
- Even application: Smooth, consistent layers are crucial for achieving the desired look.
Now that you have a clearer picture of what milky nails entail, let’s uncover the factors that can hinder your ability to recreate this chic style.
Top Reasons Why Milky Nails Fall Short
1. Quality of Products
The quality of nail products you use plays a pivotal role in achieving any manicure. Cheaper polishes might lack the necessary opacity or finish to replicate that perfect milky look. When selecting your base colors and topcoats, consider investing in reputable brands known for their performance. Look for:
- High-quality base coats: These help in adhering polish and preventing stains.
- Sheer or semi-sheer white polishes: These are essential for that milky appearance.
- Glossy topcoats: A topcoat that enhances shine can make or break your final look.
2. Application Technique
Your application technique matters significantly when it comes to nail art. Rushed or uneven application can lead to unsatisfactory results. For the milky nails to shine, follow these steps:
Your Nails Aren’t Weak — They’re Undernourished
Peeling, bending, and slow growth usually start internally.
Helps reduce peeling and breakage. PrimeBiome helps restore balance so nutrients actually reach your nails.
- Start With a Clean Canvas: Ensure your nails are clean, buffed, and well-prepped.
- Thin Layering: Apply multiple thin layers rather than one thick coat. This helps to build the desired translucency without clumping.
- Use a Light Hand: Be gentle while applying polish to avoid streaks and uneven patches.
3. Lighting and Environment
Believe it or not, the environment in which you’re applying your manicure can impact your results. Well-lit areas allow you to see the true colors and textures of the polish. Consider the following:
- Natural Lighting: Aim for a well-lit spot with natural light for the truest colors.
- Temperature: Ensure your nail polish is not too cold or too warm, as this can affect its viscosity.
- Humidity: A humid environment can delay drying times, leading to smudges.
4. Nail Shape and Length
Your natural nail shape and length can significantly influence how milky nails appear. Certain shapes lend themselves better to specific nail designs. Keep in mind:
- Shape Matters: Square or oval shapes often enhance the milky effect, providing a clean canvas.
- Nail Length: Longer nails tend to showcase the milky effect more effectively. If you have shorter nails, consider using nail extensions for a dramatic touch.
- Maintenance: Regular shaping and grooming can enhance the appearance of your milky nails, allowing them to shine.
5. Personal Nail Care
Healthy nails are more likely to produce a flawless manicure. Pay attention to your nail care routine to ensure your nails are in optimal condition. Some tips include:
- Hydration: Moisturizing your nails and cuticles prevents dryness and promotes a healthier appearance.
- Nail Strengtheners: If your nails tend to break easily, consider using a strengthening treatment.
- Regular Manicures: Schedule regular manicures to maintain nail health and appearance.
Tips for Achieving the Perfect Milky Nail Look
1. Experiment with Shades
Don’t be afraid to play around with different milky shades. While classic white is a staple, variations like soft pinks, ivories, or light nude tones can yield captivating results. Test several colors to discover which shade complements your skin tone best.
2. Try Nail Art Techniques
If you want to elevate your milky nails, consider incorporating subtle nail art techniques. A delicate line of gold foil, minimalistic dots, or even light marbling can add an interesting twist without overpowering the milky effect.
3. Invest in Quality Tools
Your tools can make a significant difference in your manicure. Invest in high-quality brushes, dotting tools, and nail files to achieve precision and ease while applying your milky nails.
Stronger nails start from the inside
Helps reduce peeling and breakage. PrimeBiome supports nutrient absorption so your nails actually get what they need.
4. Practice Patience
Lastly, patience is a virtue when it comes to perfecting your milky nails. Allow each layer to dry fully before adding another, and don’t rush the process. Take your time, and enjoy the creative journey.
Conclusion
Perfecting the milky nail look may seem daunting, but with the right knowledge, techniques, and a little practice, you can achieve that enviable finish. Understanding the components that contribute to the final aesthetic, alongside a commitment to quality and care, will empower you to create beautiful milky nails that mirror your inspirations. Embrace this classic style with confidence, and remember that the journey to a flawless manicure is as rewarding as the end result.